Build a Cozy Haven: Wren Houses Plans for Your Garden
Wrens, with their charming songs and energetic flitting, are a welcome addition to any garden. Encouraging these tiny birds to nest in your space can be as simple as providing a suitable home. Building a wren house is a rewarding project that can attract these delightful creatures to your backyard. This article will guide you through the process of constructing a safe and comfortable haven for wrens, using readily available materials and simple techniques.
Choosing the Right Location and Design
Before starting your wren house construction, careful consideration should be given to its placement and design. Wrens prefer to nest in sheltered locations, ideally facing east or southeast, providing them with morning sunlight for warmth. Avoid placing the house in direct sunlight, as it can overheat during the summer months.
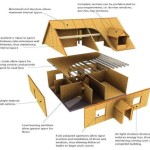
A well-built wren house should meet specific specifications. Ensure the entrance hole is 1 inch in diameter, restricting access to larger birds while allowing wrens to enter easily. The house itself should be approximately 6 inches wide by 6 inches deep with a height of 8 inches. These dimensions provide ample space for nesting, while a roof overhang protects the entrance from rain.
Consider using untreated cedar or other rot-resistant wood for construction. This ensures the house lasts for many years without compromising the safety of the wrens. Ventilation is crucial, so include a small vent hole in the back of the house to allow for air circulation.
Step-by-Step Guide to Building a Wren House
With the design and location determined, you can start constructing your wren house. Follow these steps for a successful build:
1. Gather Materials:
Gather the necessary materials before starting construction: * Untreated cedar or redwood boards * 1-inch diameter wood dowel * Wood glue * Screws * Hammer * Drill with 1-inch drill bit * Measuring tape * Saw * Pencil * Optional: Paint or stain (water-based and non-toxic)
2. Cut the Wood:
Cut the wood according to your chosen dimensions. You will need four side pieces, two top pieces, a bottom piece, and one piece for the roof.
3. Assemble the Base:
Using wood glue and screws, assemble the four side pieces, forming a square or rectangular shape. Securely attach the bottom to the base.
4. Create the Roof:
Attach the two top pieces to the base, creating a sloped roof. The top pieces should overlap slightly, creating a overhang to shelter the entrance. Use additional screws for added strength.
5. Install the Entrance Hole:
Drill a 1-inch diameter entrance hole in the front of the house, approximately 3 inches from the bottom. Be sure to drill straight through, ensuring the hole is smooth and free of splinters.
6. Add the Perch:
Cut a 2-inch piece of wood dowel and insert it into the entrance hole, leaving approximately half of the dowel protruding. This provides a perch for the wren to land on before entering the house.
7. Finish and Install:
If desired, paint or stain the house using a water-based and non-toxic paint. Allow the paint to dry completely before installing the house.
8. Mounting the Wren House:
Choose a mounting location away from direct sunlight and potential predators. Mount the house to a tree, fence post, or other sturdy structure, ensuring it is 5-10 feet above the ground.
Attracting and Caring for Wren Residents
Once your wren house is built and installed, there are ways to enhance its attractiveness to wrens. Placing the house near a source of water, such as a bird bath or fountain, can make it more inviting. Also, avoid disturbing the house during nesting season, which typically runs from April to July. Leave the house undisturbed for a few months after nesting, providing wrens with a safe space to raise their young.
Be prepared to clean the nest box after a successful nesting season. Wearing gloves, carefully remove any old nest materials and dispose of them properly. Then, disinfect the inside of the box with a solution of 1 part bleach to 9 parts water. You can also use a simple solution of dish soap mixed with water. Remember to allow the house to dry completely before re-installing it.

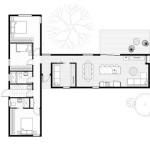
39 X 36 12m 11m Totally In Love With This Cozy Elegant House Design Floor Plan

49 X49 15m X15m Cabin Airbnb House Tour Minimalist In The Forest Design Ideas

This 525sqft House Has An Amazing Floor Plan Full Tour

The Perfect One Story Cabin House 2 Bed Bath Amazing Floor Plan

1 Modern Victorian House Plan Alice Youtube

Sunnydaze Cozy Home Led Solar Wooden Outdoor Hanging Bird House 9 25

1 Modern Victorian House Plan Alice

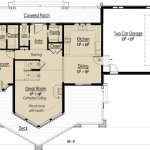
Discover Your Perfect Tiny Home Style Tinyhouseplans Com

Escape To Serenity Unveiling A Rustic Limestone Cottage In Greece

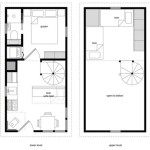
Creating The Perfect Tiny Home Sanctuary Tinyhouseplans Com
Related Posts